Make Your Putter Unique
A common inquiry I get is about painting putters for people. Given how easy it is to do yourself, I thought I would write something up to help explain how to paint your own putter (or really any golf club). You can save a ton of time and money by doing it yourself.
There are a handful of important things to remember:
- There are a million different painting techniques that work. There’s no “right way” to paint your golf club. It’s a very simple process. The end goal is to get paint onto the club and cleaned up to look nice. Whatever works for you is your “right way.”
- Nothing is permanent. If you screw up, remove the paint and start over again.
- Golf clubs take a beating. Use a high quality, strong paint.
- Be patient.
Materials
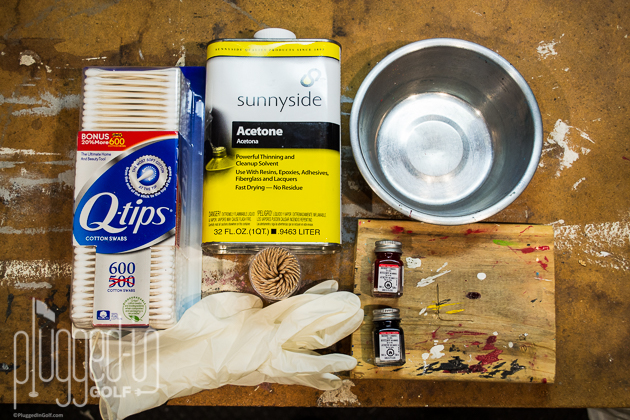
Using the right materials is key. I often see people paint their clubs with the wrong types of paints, spend a ton of time on paint removal, or struggle because of using the wrong materials. Below is my personal supply list:
- Testors enamel paints
- Acetone
- Metal or glass bowl
- Metal pick(s)
- Solid pointed toothpicks (lots of them)
- Q-tips (a ton of them)
- Latex gloves
- Wood block*
I can’t stress enough how much I rely on enamel paint. Most OEM clubs have very solid paints in them. My understanding is that these are typically a paint with a hard epoxy mixed in it or enamel paint that gets baked on for quicker, harder drying. I’ve tried acrylic paints, but they do not hold up well on the course. Others use nail polish, but I don’t think I’ve ever seen a “nail polish job” look good. Why make your club look like a cheap arts and crafts project?
*The wood block is not required, but it makes for a good work surface. It also gives you flexibility with drying positions.
Prep Work
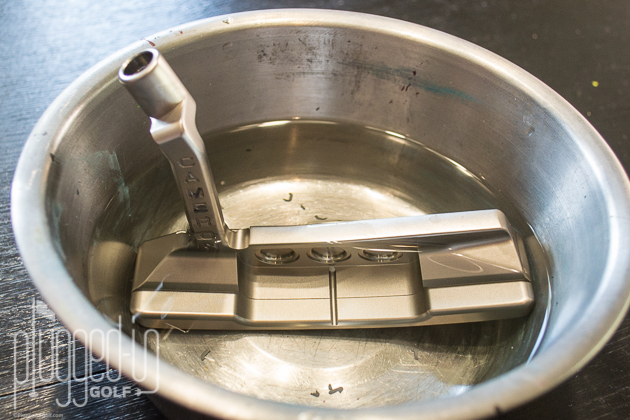
As with any painting project, a nice clean surface is an absolute must. Of course, you will have to remove the old paintfill on your club first. In some cases this is a breeze and in others it’s a tough process. What I do is soak the club in a metal bowl of acetone for an extended period of time. I make sure all of the painted areas are submerged and let the acetone do the work.
After the acetone has had some time to soak, I use the metal pick to see if I can scrape paint away. If I can’t, I score the paint to allow the acetone to soak in more. Then I wait some more and try again. After a good soak, you may need to use a little elbow grease to scrape the paint out. Just keep scraping and soaking, scraping and soaking, scraping and soaking. I have heard of others using high-grade paint remover but I haven’t gone that route. Patience and being thorough is a necessity during this step.
Once the bulk of the paint is out, you can use the q-tips to mop up the bits of paint and acetone left behind. You may also notice the putter looking streaky in areas from the acetone and paint residue. This is no big deal. Just use a q-tip with clean acetone and smoothly wipe the streaks away.
Pro tip: wear latex gloves when working with the acetone. Your hands will thank you later.
Make sure your club is free of paint and acetone at this point or else your paint may struggle to properly adhere to the metal. I sometimes scrub the putter with a toothbrush and dish soap to make sure the metal is free of any grease. After all cleaning, make sure the putter is completely bone dry.
Painting
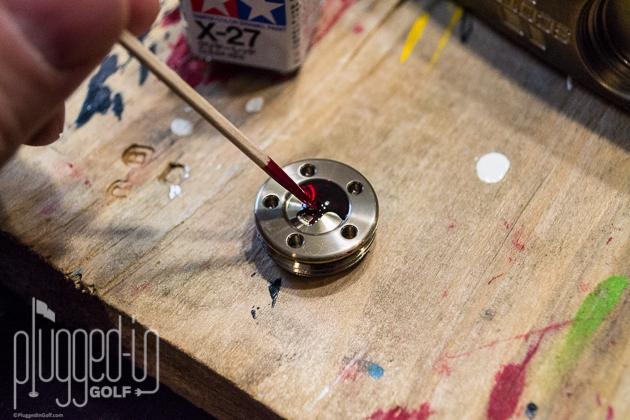
As mentioned before, there are a million different ways to paint a golf club, and any one can work. I like to use a toothpick to generously apply paint to the surface without going overboard. Remember, the more excess paint you have, the more you have to clean up.
It’s important to make sure you have a thick layer of paint, but with lots of paint comes a risk for bubbles. This is especially noticeable with translucent paints. The key is to make sure you work all of the bubbles out of the area you want painted. One technique I’ve used is to “drag” the bubbles into a spot outside of the painted area and clean it off after it dries.
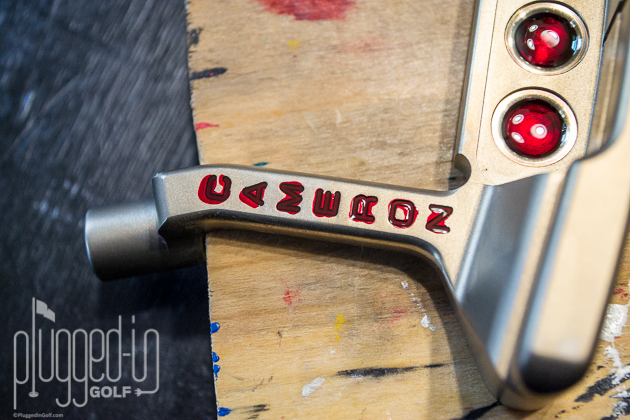
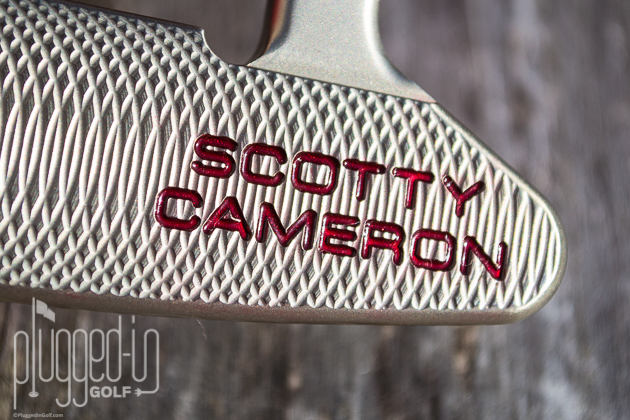
The picture above is what my projects tend to look like after applying paint. This approach ensures that I’ll have a thick layer of paint in every area. It can get tricky when you have a lot of detail like this Scotty Cameron. One tip is to start in the middle and work out. This is really good advice, so keep it in mind as you get started. As you get better at painting, you’ll figure out what you can get away with and how to work around difficult areas.
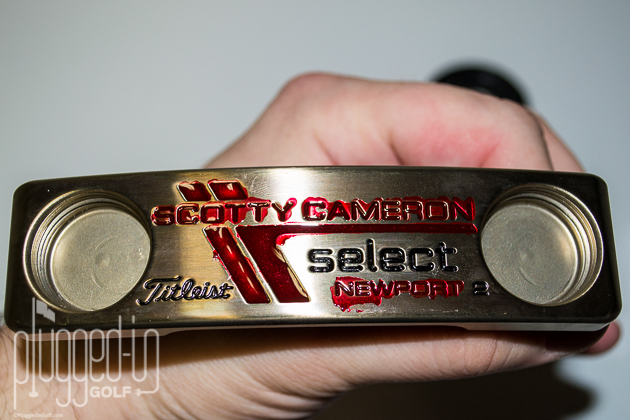
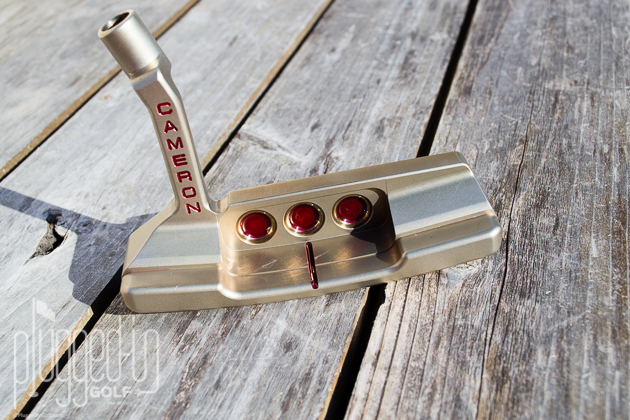
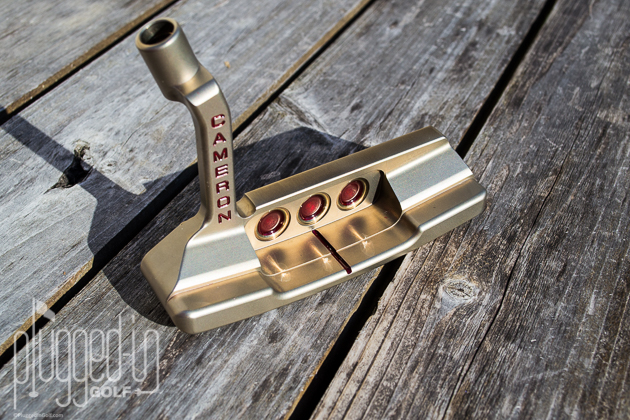
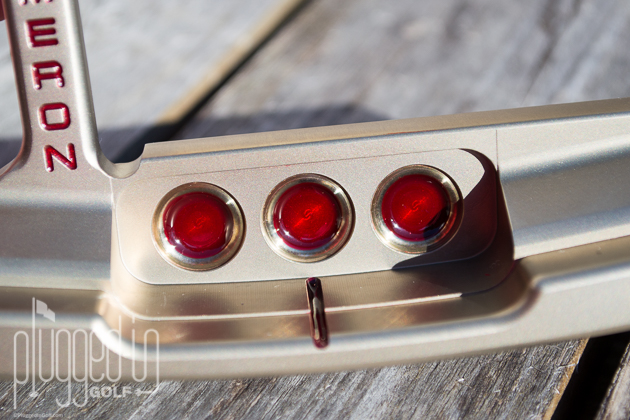
The final insight I’ll give in regards to actually painting is that you need to be diligent and patient with the larger areas like the cherry bombs, weights, and lines on the sole of this Cameron. Larger surface areas are the most difficult to clean up smoothly and to get to dry evenly. Don’t be alarmed. The good news about paint is that you can clean it out and start over.
Cleanup
As with painting, there are a lot of different cleanup techniques that work for people. Some people like to clean up all of their paint right after applying it, some like to let it dry completely and scrape it away with a razor. My technique to is to dip a q-tip in acetone and lightly brush away the excess paint after the paint has been drying for two to three hours. Pro tip: let the paint sit for a couple of hours so it’s still soft enough to clean up easily, but tacky enough it doesn’t run everywhere when the acetone hits it. With this project, I realized that when I let the paint dry overnight, good cleanup was difficult, if not impossible.
For large areas like the cherry bombs, you need to be careful to avoid contact with the area you want to be painted because the acetone will ruin it. This takes a little touch and practice, but you’ll get the hang of it. Letters are generally pretty easy. With letters I do the same thing as above, but you can lightly wipe across the letters and still get good results. I advise using the “middle out” method mentioned above. This will have you wiping the excess paint one direction and away from any trouble. You’ll find that this makes your overall cleanup much easier.
Final Thoughts
I have been painting golf clubs for years, and while I don’t claim to be the best at it, I would say I am proficient. Still, this project really tested me and taught me a lot. I typically use Tamiya red translucent enamel because it is the best match to Scotty’s trans red, but it absolutely refused to dry smooth on this putter. After weeks of fighting it, I switched over to Testor metal flake red which is a translucent red with some flake in it (pictures don’t do it justice). That switch saved this project, and the paint dried perfectly on the first shot. As a bonus, it looks way cooler than the Tamiya paint. Between that paint switch and shortening my drying time, I learned two valuable lessons that will impact how I do all my paint projects going forward.
As I’ve mentioned numerous times, persistence and patience were the keys to successfully completing this paint project.
Bill plays Scott Readman Concepts putters and accessories.
- Puma Ignite PWRADAPT Golf Shoes Review - March 22, 2018
- TaylorMade M3 Driver Review - March 14, 2018
- TaylorMade M4 Driver Review - March 5, 2018





21 Comments
Where can you buy the paints Bill?
The Googles!
Really most hobby/model shops or there are a lot of places online.
Great write up Bill! That’s one lucky dude that ended up with that putter… ;)
I use some acrylic but I then put a clear wood varnish over it that is likes hard cover that is so good that it takes three or more tries with paint remover to get the paint out
That’s a good tip!
How about Non-Scotty putters. I have a White Hot 2-ball that i really want to dress up. Would it be the same process?
Yes, same process. Just keep in mind that the acetone will destroy the insert and the discs so be careful with those. Keep in mind the discs are not painted on, they’re like an insert.
Loving this! Are you using the Testor paint straight out of the container or are you mixing it with something? Is the Testor Enamel Gloss naturally translucent?
Straight out of the container. No, enamel gloss is not naturally translucent. You have to buy a translucent paint.
Have you ever tried paint filling a Vokey wedge with the raw black finish? I am wondering if the acetone or any product to remove the existing paint would damage the black finish?
I haven’t in quite some time, but no, acetone should remove the black finish.
For anyone looking to do this and use as close as possible to the exact same red that originally came on your Scotty Cameron, I suggest Tamiya red translucent enamel paint. It can be found at most hobby shops.
hello bill–doing a studio design 1 scotty cameron–soaked in coke then vinnegar seems it could be better–wonder if you have anyother ideas to bring it back to clean and no rust metal before i gun blu it–
thanks joe
Taylor Made Spider S Putter. What would the necessary steps be to paint those Putter. I have stripped it down to the stainless steel and aluminum. But I am trying to know figure out what type of paint I should apply to it. If you could let me know if this would be awesome.
Gates,
Unfortunately, Bill is not writing for PluggedInGolf anymore.
From my limited experience, I don’t think there’s any reason that the Spider would require different paint than is used on a Scotty or other putter.
Best,
Matt
I’ve paint filled several of my Scotty Cameron putters with good results, but using clear color tamiya acrylics on the weights seem to turn to a waffle look on the top, which makes the clear color of very little use. It doesn’t seem to matter how long I let them dry, this seems to happen if I put on the head cover or use them. It has never happened on the rear cherry dots with the same clear color mix. I would appreciate any help you could send my way. I guess I’ a true blue DIY guy.
Lewis,
Unfortunately Bill does not write for PIG anymore, and I’m by no means a paint expert. Sorry I can’t help.
Best,
Matt
Anyone else absolutely LOVE the pre paint look?
Having seen that Scotty without any paint on it I’m seriously considering giving this a go on my Newport and maybe even my irons! Love it.
Would you mind sharing the exact name or part number of the paint used here? I have the same putter and you have achieved exactly the finish I am after?
Wes,
Bill, who wrote this article, no longer writes for Plugged In Golf. Sorry we can’t help.
Best,
Matt
It’s kind of funny. Bill isn’t a paint expert, just a guy who dabbled a few times. I’ve painted for 40 years. Aluminum, galvanized, wood, houses, boats, ships, electrostatic, automotive, etc.
nail polish is about the same enamel as the hobby store. Don’t get why he thought it inferior. Women’s nails go through a lot and it holds up for a while. Clear coat everything, that’s the secret. 2 or 3 coats if u have the time. Tiny paint brushes with cleaning as u go is easiest. Move from left to right is also easiest as a right hander.